Wednesday, December 28, 2011

Homemade Gifts

This Christmas I decided that I would like to make some gifts for people.

Mum got this handmade gardeners scrub. Very easy to make and gets the dirt off making your hands feel moisturized afterwards.

Handmade Scrub
  1. Mix equal parts rock salt, brown sugar and white sugar together in a container.
  2. Drizzle over a small amount of Olive oil. Just enough to combine the ingredients. Mix together.
  3. Add a squeeze of lemon juice.
  4. Add essential oil if you wish. I added some lavender from my garden instead.


I spent some time sewing some dresses for my niece. The first dress (in blue) I made my own pattern for. The second (in red) I used the Sew La Tea Do pattern for the "Miss Adorable Frock". She sure looked adorable in them both!


And no gift would be complete without a homemade gift tag. Here's me and my little helper preparing our gift tags in preparation for some good ole hot glue gunning!


Merry Christmas, Happy Holidays and Happy Giving!!

Share/Bookmark

Thursday, December 22, 2011

Storm Trooper Snow Flake

For all of you Star War's geeks out there....


I made this one Friday-Crafternoon at work. You can make one too by downloading the template from this awesome website. You can also make Darth Vader, a Clone trooper, Boba Fett and a very elaborate R2D2 (which will require some experienced cutting skills).

My 3 year old nephew was very happy with his Storm Trooper Snowflake - who would have thought?

Share/Bookmark

Monday, December 19, 2011

Kingsley's Christmas Cake

Due to the popularity of this previous post here is the recipe for the infamous Christmas Cake that I used Jack Daniels in.

1½ kg mixed fruit (we add packet of glazed cherries to mix)
½ cup sherry, rum, whisky or brandy
1 granny smith apple
1 tbsp golden syrup or honey
1 cup brown sugar, firmly packed
250g butter
4 eggs
1½ cups plain flour
½ cup self raising flour
1 tsp mixed spice

Place chopped mixed fruit in large basin, add the alcohol, peeled and coarsely grated apple, golden syrup (or honey), sugar and eggs. Mix well with wooden spoon or hand to break up any clumps of fruit. Add cooled melted butter, sifted flours and spice. Mix thoroughly.. Place in deep 23cm round or deep 20cm square cake tin lined with three sheets of greaseproof paper – bring paper 5cm above edge of tin.

Bake in middle of slow oven (around 130°C) for 3½ hours or until cooked when tested. Remove from oven and brush evenly with about 2 tbsp of extra alcohol, cover tightly with tinfoil, leaving greaseproof intact. Can be refridgerated in plastic food wrap for a least 6 months.

ENJOY! (we have had this made for us this year to eat on Christmas day - holding out big time!!)

Share/Bookmark

Homemade Yoghurt

So I've been an owner of an Easiyo yoghurt maker for quite a number of years now and go through fads of using it. One of the pro's was that it was better for the environment for me to make my own yoghurt than to purchase something in a plastic container (which up until recently was non-recyclable in Wellington, NZ).

However the cost of a sachet (over $3) and the convenience of buying many different flavours already made at the same price made me less ecologically savvy and more focused on how much money I had in my pocket (selfish I know!)

Then from reading many different blogs about sustainability and frugality I kept reading about how people make their own yoghurt from milk or milk powder and I thought - I can do that! So I have found a recipe that has worked for me and it created this delicious thick yoghurt featured below with boysenberries.


Homemade Yoghurt

  • 2 Cups of Whole milk powder
  • 2 Tablespoons of natural yoghurt (I used a previous batch of Easiyo Greek Style)
  • Cold water (close to room temperature)


  1. Put ingredients into the Easiyo jar.
  2. Use a whisk to mix together.
  3. Top up with cold water and put the lid on.
  4. Fill the Easiyo maker with boiling water up to the top of the baffle. 
  5. Place jar into the yoghurt maker and top up with boiling water.
  6. Put the lid on and leave for 8-12hrs 
  7. Remove jar and refrigerate.
Result = thick creamy yoghurt for around $1.50!

Share/Bookmark

Sunday, December 18, 2011

Christmas bunting

What could be more festive than Christmas bunting?


 Very easy to make. Simply make a triangle template for the size bunting that you want. Fold some material in half and cut out the triangle. Repeat with different fabrics. I used pinking shears so that I didn't have to do any extra sewing but you could sew them to give them a nice finish. You can buy a long piece of ribbon by the metre (around $1) that is already folded. Simple place your triangle material within the fold of the ribbon, pin in place and once you have them all put in you can sew from one end to the other. Or if you really can't be bothered.. a hot glue gun is the next best thing!
Share/Bookmark

Thursday, December 15, 2011

The best type of compliment

My Secret Santa "giftee" (who still doesn't know it was me) thinks that the brooch I made her was purchased from a shop!!!

Wish I had taken a photo of it!

So glad to see someone genuinely happy about their gift. That in itself is a gift back to me.
Share/Bookmark

Friday, November 25, 2011

Poppies


Share/Bookmark

Sunday, November 20, 2011

A little unknown fact about myself.

Coffee Cup 
I absolutely adore Crown Lynn.

Sometimes I wonder what the attraction is. Retro design? Durability? I think perhaps it is more because of what it represents in our history.

Crown Lynn had humble beginnings as the Amalgamated Brick and Pipe company. During World War II there was a ban on unessential imported items into NZ hence the need for tableware made out of NZ clay. In 1942 Crown Lynn began production of tableware for New Zealanders.

The utilitarian features of Crown Lynn pottery gained the product the status of being "sturdy and reliable".

Crown Lynn reached it's peak in the 60's with it being an item in every household. It held it's popularity until the late 80's when the factory closed possibly due to the increase of cheap tableware from overseas.

This makes me sad. NZ was producing an item that was uniquely us. Strong and reliable, pretty, durable and ready to last the test of time.

Detail of Calyptus

The only place you can buy Crown Lynn now are garage sales, op shops, school fairs and antique shops. This everyday household item has become a national treasure. I get so excited when I find it. It's like I'm collecting my own little piece of NZ.

Trust me, despite it's increasing popularity and showcase properties I actually use my Crown Lynn for it's intended purpose (although I did oppose it being used as a cat bowl the other day!!) Some people may be shocked by this but hey whats the point of material possessions unless you use them?

Kiwi meal - Meat and Veg served on Crown Lynn Colourglaze
Below are some of my collection. If you see any of the styles below at a school fair over the summer for a couple of bucks please do buy them for me (I'll pay you back!)


Share/Bookmark

Tuesday, November 15, 2011

Pīwakawaka

It's amazing what you can pick up in op shops!

This is a New Zealand made vest with pīwakawaka/fantail detail.

I get a little thrill when I find something in an op shop that I know is something special!
Share/Bookmark

Thursday, November 10, 2011

Gingerbeer

I got the bug! The Gingerbeer bug that is!

At the Karori Normal School Fair a couple of weeks ago I purchased a gingerbeer bug and began to feed it (2 teaspoons of sugar and 2 teaspoons of ginger every day).

The gingerbeer itself was pretty simple to make. I simply drained liquid from the bug into a bowl, added 2 cups of hot water that had had 2 cups of sugar dissolved in it and then the juice of 2 lemons and 12 cups of cold water. Mixed it up and then put it into bottles which had 3 raisins in the bottle.

The instructions suggested I put the bottles in a sunny spot for a week (oh but where is the sun?) and then in a week's time put it in the fridge and then it's ready to drink.

I did a little bit of googling and found several different recipes for gingerbeer with most suggesting that you put the bottles outside incase they explode (good tip!).

I can't wait to try the fruits (rhizomes??) of my labour this weekend!
Posted by Picasa

Share/Bookmark

Wednesday, October 19, 2011

Sew Good

I had a little time up my sleeve today and I had promised my sister in law that I would make baby Amelia some bibs as she needed some more.


But the internet is full of exciting tutorials of how to make things and I could not resist making these booties!


So easy to make and cute too! A little bit too big for her right now but she can grow into them. I got the tutorial for the booties from www.stardustshoes.blogspot.com if you would like to make them too!

I can't wait to surprise Jane with them tomorrow!
Share/Bookmark

Sunday, October 16, 2011

I love laundry!

Yes I really do! But recently I have been a little disappointed in my laundry powder as it doesn't seem to dissolve and leaves white marks on the clothes.

But it's OK because I've found an extremely affordable, good for the environment laundry liquid to make! And it works even better than the powder.

I found it via Frugal Kiwi's website and have halved the recipe so that you can make it in a small bucket.

Laundry Liquid

1/2 Cup Borax
1/4 Cup of Washing Soda Crystals
1/2 bar of Sunlight soap or any other castile based soap
Essential oil

  1. Grate the soap and melt it in 2 cups of water in a pot on a low heat. Avoid boiling it, it is ready when it has just melted.
  2. Pour the melted soap mixture into a bucket and add 22 cups of warm water.
  3. Add washing soda crystals and stir until dissolved.
  4. Add borax and stir until dissolved.
  5. Add essential oil to suit (I used about 20 drops of rose oil)
  6. Cover the bucket with a towel or lid and let sit overnight.
  7. In the morning the concoction should resemble a shiny globby gel. If there is water sitting on top simply mix it back in.
  8. Pour the mixture via a funnel into clean milk bottles.
  9. Use 1/2 cup per load.

This recipe made two 1.5L bottles full and one 2 litre bottle fill with a bit left over!!! Cost wise I think it works out to about 5c per load!!

Borax sounds like a horrible chemical but it is actually a mineral salt. You can read more about it here. As for buying it I sourced mine from Clorogene in Petone, Wellington for $13 for 2 litres. You can also buy it off Trademe and from Bin Inn but it is more expensive.

My clothes are clean and smell great!


Share/Bookmark

Friday, September 30, 2011

Spring seedlings

The weather has definately taken an upward "spring" and things are beginning to grow in the garden. Last week I spent hours pouring over the Kings Seeds catalogue planning what vegetables and flowers I'd like to grow.

This week my wonderful partner has spent time making our own newspaper pots and putting those seeds to bed. I can't wait to see these tiny seeds turn into beautiful plants...

We have planted from seed:
Kingfisher Daisy, Sunrise Lupin, Nemophila (penny black and snowstorm), Oriental Poppies, Cherry Baby Rudbeckia, Edible Violas and Gazania Daybreak.
This weekend we will plant:
Red bunching onions, Heirloom Rainbow Tomatoes, Lettuce (little gem), Zucchini (gold rush), Jalapeno Chillis, Gourmet Basil mix, Eggplant, Artichoke and Corn.
Share/Bookmark

Wednesday, September 28, 2011

Kereru

I made this cushion cover using an old blanket that came from my Mum's family. I used felt pieces to make the shape of the kereru. I figured that because I don't have any Kereru in my garden yet I might as well have one in my lounge!


Share/Bookmark

Tuesday, August 9, 2011

The native garden

My wonderful friend Jay came down from Auckland to help us begin landscaping our garden. Not many people I know would pack a skill saw in their backpack for a weekend away!

The first project was to create a native garden. The idea behind this was I wanted to create a garden for native birds to visit. When we lived in Wilton we had Tui, Piwakawaka and Kereru visit all the time.

To start we finished putting edging in to create a garden (Mary and I had started this a few weeks earlier) and dug up the grass to expose the soil and began digging holes for the new plants.

I was fortunate enough to have been told to help myself to any native seedlings I needed from the small patch of bush outside our previous neighbours house. Jay and I took the spade and came back with a boot full of green harakeke (flax), mapou, horoeka (lancewood), and puahou (five finger). I had already collected some rengarenga lilies from my workplace (they divide so easily)!

I was fortunate to have been given a garden voucher from the families at my last workplace so I spent it putting the finishing touchs to the garden. I'm also awaiting for the kowhai tree I have ordered to be ready. All it needs now is some extra soil and some leaf mulch to give it that organic look.

Let the transformation begin....

Share/Bookmark

How the garden began

Daphne Odora Leucanthe "Alba"Where is Minnie?A visitorFront edge of deckFront FenceFront garden
Karma CamelliaExisting shrubGate to the housePlanter bedsFront doorSide garden
Side gardenUnknown shrubP6280557Side of the shedMidday Winter Sunexisting vege area
Poor drainage against back fenceVege areaVege areaBack fenceback cornerSide of house

How the garden began, a set on Flickr.

A wonderful blank canvas to start with.


Share/Bookmark

Tuesday, June 28, 2011

Oh Daphne!

Different smells evoke different memories for me. One of my favourite childhood smells is that of Daphne, hence why I wanted my own Daphne in my garden.

This particular Daphne is Daphne Odora Leucanthe "Alba" but I am going to call it Jessica for short.

I patiently wait for it's little white flowers to come out.

Share/Bookmark

Friday, June 17, 2011

Actually MY house!


We have moved! It has been a busy couple of weeks transitioning into our new house but I'm already on to making it our own.

Existing vege garden complete with shade cloth!
First task was to plant the feijoa tree that I got given from my workmates a month ago. The soil had a clay base so I mixed some compost in and then mulched the tree with pea straw. I did the same with the citrus trees - a Meyer Lemon and a Grapefruit tree. All are looking healthy as they get established.

There are a couple of raised garden beds already so I have used these to get some stuff planted for eating. I divided the rhubarb and strawberries in one (got to love plant duplication!!) and in the other I planted Awapuni seedlings - brassicas and spinach. There were already some carrots in there which have been a favourite edible treat for my 3 year old nephew to pick fresh.

I have never had to start from scratch before so it has been an interesting process to put my ideas into actual landscape designs for the property. I actually found out I'm not too bad with a pencil!! We start our first landscaping project this weekend..... watch this space!!
Share/Bookmark

Thursday, May 5, 2011

Hot Chilli Sauce!

When I was growing up I was fortunate to live across the road from a chinese lady who used to make me prawn toasts and fried rice for my birthday every year. She also made this amazing chilli sauce which was so hot you could only put a few drops on your food.

I made contact with her son last year to get the recipe and found out that she had passed away about 6 years ago. While I was deeply saddened by this I was pleased to find out that her youngest son had collected all her recipes from her while she was ill. This was good thinking on his part as she kept her recipes in her head.

So I made her chilli sauce this week as my own personal tribute to her. It isn't as hot as hers', most likely because I used a combination of asian fire and jalapeno chilli's (homegrown of course!!). My favourite way to have it was mixed in cooked cabbage - so guess what's for dinner!!

Here is the recipe, I made a smaller batch which made a very large jars worth - very easy to make and tastes delicious!


Chilli Sauce
Ice cream container of chillis.
6-7 cloves of garlic, peeled and smashed.
Cut top of chillis and mince in food processor. Add Garlic and the juice of 8 lemons.
In a large pot, add 4 cans of tomato sauce, bring to the boil.
Once boiled, add the chilli mix.
Add 1 cup of sugar and 3-4 teaspoons of salt.
Bring to the boil and let it boil for 5-7 minutes and then remove from heat and cool.
Share/Bookmark

Wednesday, May 4, 2011

My house, my garden

So we did it. We bought a house and now we must live off the land in order to live because paying a mortgage is going to be hard!!

We were unsuccessful in our tender for the pumpkin growing house in Northland. Somebody with far too much money and not enough sense paid an enormous amount for it. However we did find a cute house in Paparangi that has an expansive area of flat land and neatly manicured lawns ready to fully landscape.

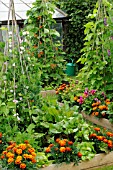
Perhap's something like this?
We move in a months time and I have already planned what I would like to plant. First we will start with the fruit trees. My workmates gave me a feijoa tree and I would also like a lemon and a grapefruit and perhaps a peach or pear tree. Actually I can grow as many kinds of fruit trees as I want because I have the space!

I am thinking for the vegetable garden I would like to go potager style, keep it raised and perhaps do that rotating crops thing. Again I have plenty of space to do it!

As for Paparangi, I found out that the name is actually a colonised version of "Papaparangi" which means folding hills. It was once farmland and all the street's are named after the children who once lived in the area. Nearby is Seton Nossiter Park which is a large nature reserve so I will still get visiting native birds. I am also planning to plant a small native bush on our property with a kowhai and cabbage tree as the centrepieces.


Share/Bookmark